
Last week was my little guy's birthday! Although I love to bake, I am by no means a professional baker. I lack the talent and the patience. However, there has always been one cake that I wanted to try and make- and this year was the year! It's called a 'piniata cake' It is a cake that is hollowed out in the center and filled with lots and lots of candy. Then it is topped with a decorated chocolate dome, and brought to the table with a toy hammer, and all the kids take turns trying to break the dome and get to the candy. It is a ton of fun! Luckily, I got some great guidance and encouragement from a friend of mine, who happens to be a professional baker. I loved the challenge, especially because the result was awesome- and my kids are still talking about it!!!
If you're gonna bake a birthday cake- make it a good one.

Here's how to do it. You will need: A medium sized steel bowl. This is for making the chocolate dome.
4 cups of chocolate chip + 1/4 cup Crisco (to make it non-dairy) OR
2 cups of Chocolate Wilton Candy Melts (available at any baking store)
1 box of your favorite cake mix- trust me, the kids will be sticking their hands into this cake- it's not worth making from scratch
lots and lots of candy to fill the cake with and to decorate it with
Ok. The chocolate dome is the tricky part- the rest is really easy.
Take you steel bowl and generously spray it with cooking spray. Place it in the freezer for at least 30 minutes. Meanwhile, fill a pot with water, and bring to a boil. Once the water is boiled, reduce the temperature to low, and place the glass bowl with your chocolate and Crisco or Chocolate Melts over the pot. The bowl should not be touching the water in the pot. The simmering water will begin to melt your chocolate. Use a wooden spoon to stir it until it is all melted and smooth. Remove the chocolate from the pot, and let it cool a little. Get your bowl out of the freezer and pour the chocolate into it. Rotate the bowl so you are swirling the melted chocolate and coating the bowl evenly. (Sorry I have no pictures of this part- impossible to photograph while making!) Place the bowl in the freezer overnight and for up to 2 days.
The next step will be to get the chocolate dome out of the bowl in one piece...Listen carefully. Remove the bowl from the freezer and turn it over onto a baking sheets. Dip a kitchen towel into very hot water and use that towel to rub the top and sides of the bowl. This should loosen the chocolate up. Say a prayer, and keep rubbing for about 5 minutes. If it doesn't come out, get a really sharp knife and carefully, run it around the edges of the dome to help loosen it. It should come out- it's not as hard as it seems. And, in the worst case, if it breaks, you try again. (I made 2 just in case). Place the dome back into the freezer until you are ready to decorate.
Bake you cake according to package instructions. You are going to want a high cake that matches the circumference of your dome, so that it fits over it well. (I divided my cake batter into 2 round 9 inch cake pans.) Cool the cake completely. If you baked 2 cakes, stack them one on top of the other. Use a sharp knife to cut away some of the center of the cake, creating a well in the center of the cake. You can eat that part, or disregard it. Now, fill the cake with candy. (I used chocolate coins, bazooka, jelly beans, gumballs, chocolate non pareils, licorice.) Set the cake aside. You can maek that part @ days a head of time, just wrap in plastic wrap until ready to serve.)
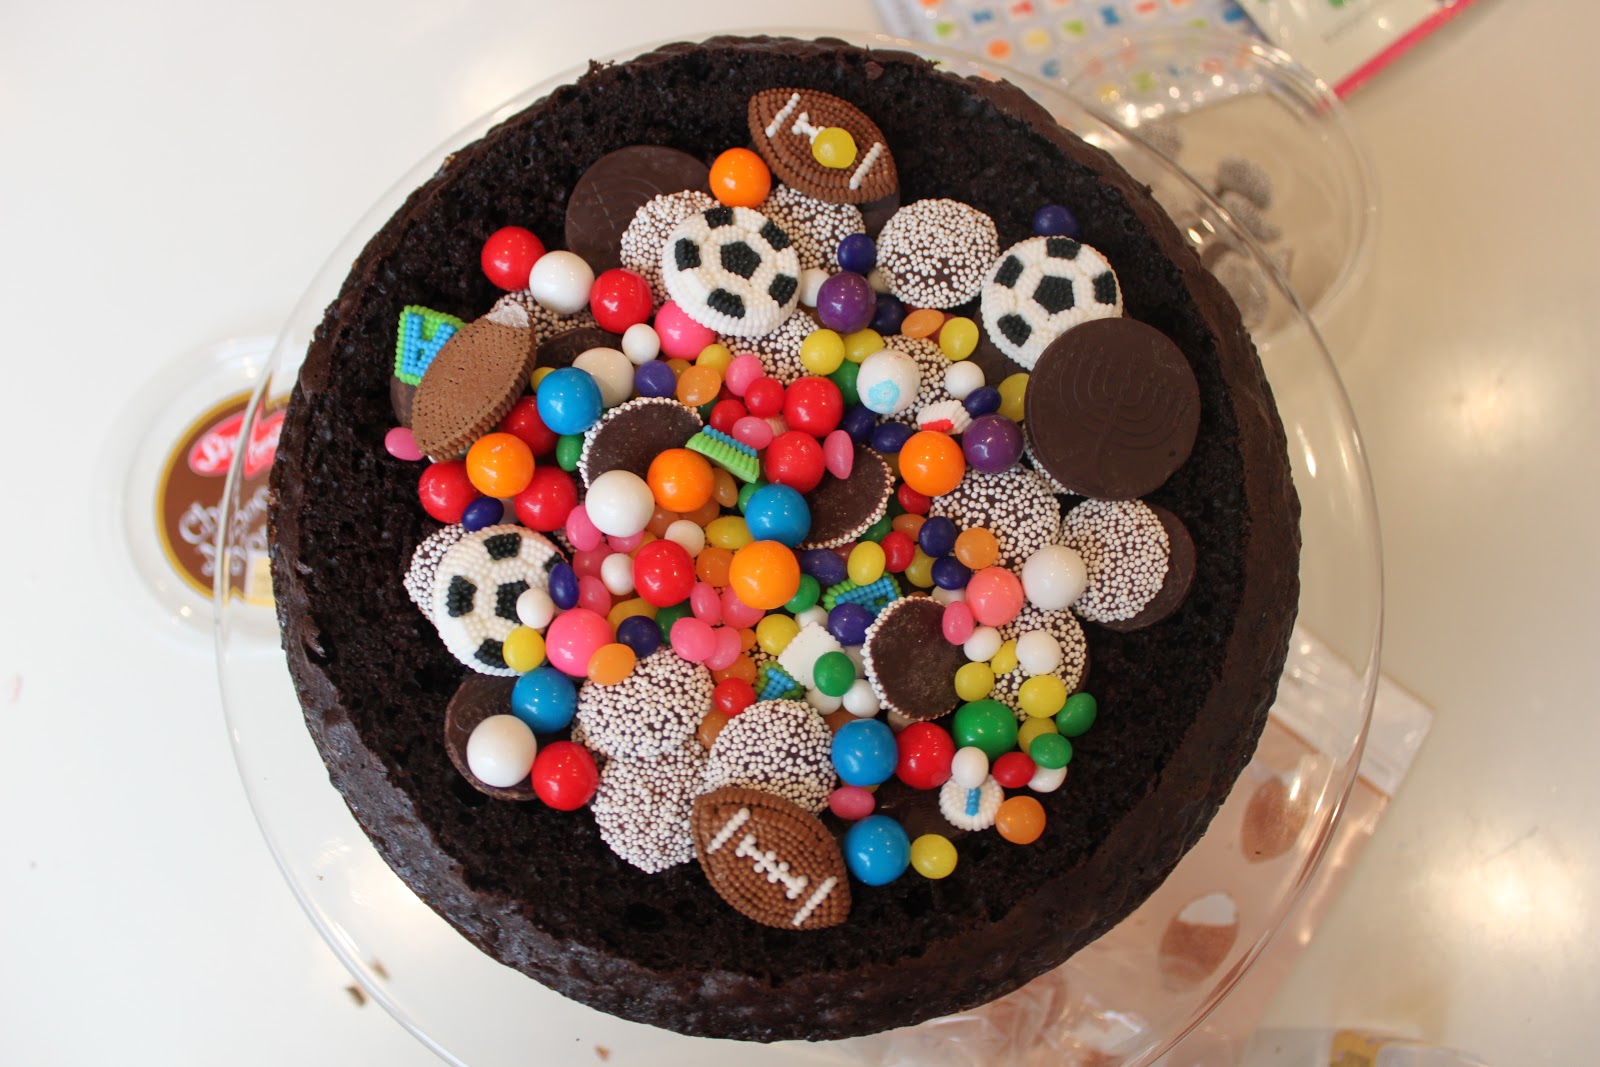
Decorate the chocolate dome: work quickly because you want to keep the dome firm. I used store bought icing to stick the decorations to the dome. Once you are done decorating the dome, replace it in the freezer until you are ready to assemble the cake. Assemble the cake just before serving. Place the dome over the filled cake, and serve with a toy hammer. Stand back and have fun!

Here I am decorating the dome

I used Wilton Sugar Sheets Edible Alphabet

Top view

Side view
The good stuff!

Place the dome over the cake
Serve with toy hammer

Look at those faces!

So worth it!
No comments:
Post a Comment